
Choosing Kitchen Materials That Work Together, Not Against Each Other
Most kitchen material decisions get made one at a time, in isolation, usually at a showroom counter with a tile sample in one hand and a paint chip in the other. That's how you end up with a backsplash that fights the countertop, hardware that clashes with the faucet, and flooring that looked great on a sample board but shows every scuff by month three. Materials decisions work better when you make them as a set, with an eye on how they'll actually get built and installed.
Here's how to think through the three decisions that trip people up most: backsplash, metal finishes, and flooring.
How Do I Choose a Backsplash?
A backsplash is one of the smallest material footprints in the kitchen and one of the most visible, so it gets asked to do a lot of work: tie the cabinets to the countertop, add texture or color, and survive grease, water, and daily wiping.
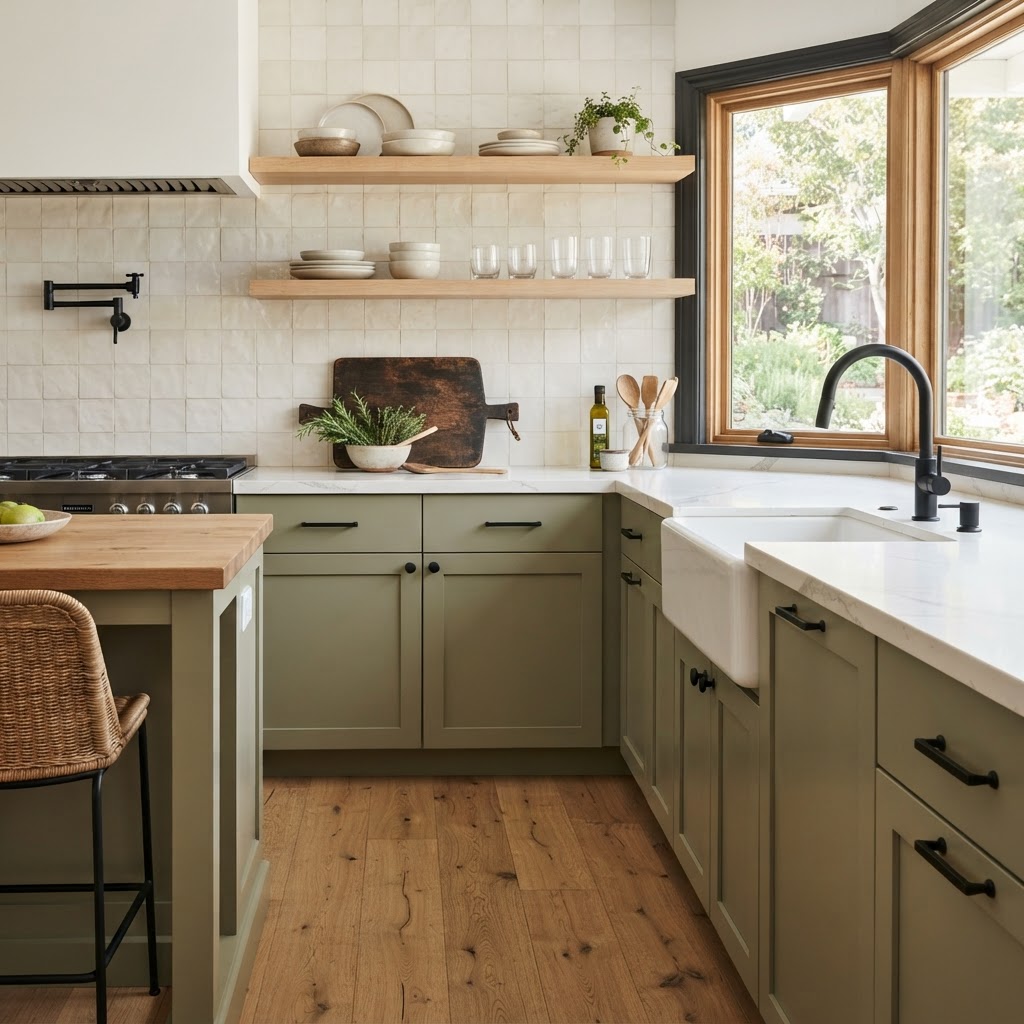
Start with what's already fixed. Your countertop material and cabinet color are usually locked in before backsplash gets picked, so let those set the boundaries. If the countertop has movement or veining, a quiet backsplash — subway tile, a simple stacked pattern, a slab that reads as one plane — gives the eye somewhere to rest. If the countertop is a solid, low-pattern surface, that's your opening to bring in a bolder tile: a picture-frame layout, a colored zellige, a patterned cement tile behind the range.
Think about maintenance before you think about looks, but don't assume every material in a category behaves the same way. Many natural stone backsplash tiles need periodic sealing, and how often depends on the specific stone, its finish, and the sealant used — some honed or dense stones need less attention than porous ones. Porcelain and ceramic tile generally resist grease and clean up easily, though textured or matte-finish tiles can take more effort to wipe down than glossy ones. Grout width and color matter more than people expect — a wide joint in white grout behind a stove tends to show grease and staining faster, and while a darker grout or tighter joint can help mask daily wear, sealed grout and grout type also play a real role in how it holds up over time.
Full-height backsplashes — running tile or slab all the way to the upper cabinets or ceiling — are a look some homeowners prefer because they eliminate the strip of painted wall above the counter, but they cost more in material and labor and aren't inherently a better choice. A standard 18-inch backsplash with a simple layout is still a completely legitimate option; it's a budget decision, not a downgrade.
Last thing: bring an actual sample home and look at it under your kitchen's lighting, day and night. Showroom lighting flatters almost everything. Your kitchen's mix of natural light and fixtures will not.
How Do I Mix Metals in My Kitchen?
Mixing metal finishes — faucet, cabinet hardware, lighting, appliance trim — used to be treated as a design mistake. It's become a more common approach in kitchen design, but it works best with a rule, not a free-for-all.
The simplest approach: pick one dominant metal and one accent metal, and let the dominant metal show up in the highest-traffic touchpoints — cabinet pulls, faucet, maybe the sink. The accent metal shows up in lighting, a range hood, or open shelving brackets, where it's seen but not touched constantly. Two metals is manageable. Three starts to look accidental unless there's a clear logic to it, like warm metals on the perimeter and a contrasting metal on an island.
Finish sheen matters as much as the metal itself. Brushed and matte finishes tend to show fingerprints and water spots less noticeably than polished or high-shine finishes, though this varies by manufacturer coating and how the surface is maintained. If you're mixing brushed nickel and brushed brass, that pairing is generally more forgiving than mixing a polished chrome faucet with matte black hardware, where the sheen mismatch is often what actually bothers people, not the color difference.
Appliances complicate this because you don't always get to choose finish granularly — stainless steel is still common on ranges, hoods, and refrigerators, and it functions as a neutral. Treat stainless as its own lane rather than trying to match it precisely to your hardware metal; it rarely matches exactly anyway, and forcing it usually looks worse than letting it sit as neutral machinery in the room.
What Flooring Works Best in a Kitchen?
Kitchen flooring takes more abuse than almost any other surface in the house — water at the sink and dishwasher, dropped cast iron, grit tracked in from outside, chair legs sliding at the table. The material has to hold up to all of that while still looking like something you chose on purpose.
Hardwood remains a popular choice for kitchen floors because it ties into adjacent living spaces without a visible transition. The tradeoff is water sensitivity at the sink, dishwasher, and refrigerator water lines — a spill left overnight can cup or stain solid wood. Engineered hardwood can handle humidity swings better than solid wood in some cases, but performance varies by product construction, core material, and finish, so it's worth reviewing a manufacturer's specific moisture and installation guidelines before choosing any wood product for a kitchen.
Tile, particularly porcelain, is among the more water-resistant flooring categories and generally holds up well to heavy foot traffic, but actual performance depends on the specific product, installation method, and grout used. Tile is also hard underfoot for anyone standing at a stove or sink for long stretches, and dropped glass or dishware doesn't survive contact with it well. Large-format porcelain tile that mimics wood or stone has gotten good enough that it's a legitimate stand-in for either, though water performance still depends on the specific product and installation.
Luxury vinyl plank has become a common practical choice, and many LVP products are marketed with waterproof or water-resistant wear layers. That said, a waterproof surface layer doesn't automatically mean water can't reach the subfloor — seams, perimeter gaps, and transitions are common paths for moisture if the product isn't installed correctly or doesn't include a sealed system, so it's worth checking manufacturer installation specs closely. Comfort underfoot and resistance to denting or staining also vary by thickness, wear layer, and manufacturer, so don't assume all LVP performs the same. Buyer perception of LVP compared to real wood or stone can vary by market and price point, and it's worth discussing with a real estate professional if resale value is a priority for your specific home.
Whatever you land on, match the flooring's install sequence to the rest of the job. Cabinets are typically ordered first and installed, and countertops get templated against those installed cabinets — flooring decisions need to account for whether the floor runs under the cabinet toe kicks or stops at them, which affects both material quantity and finish height at transitions.
Making the Decisions Work as a Set
The common thread across backsplash, metal, and flooring is that none of them get chosen in a vacuum. A decision made in week one about countertop material quietly limits your backsplash options in week three, and your flooring choice affects how appliance kickplates and cabinet toe kicks get finished later. Projects go smoother when scope, layout, materials, coordination, and construction sequencing get planned together instead of picked off one at a time as they come up.
If you're at the point of picking finishes and want a starting framework instead of a stack of open tabs, start planning with a structured look at how these choices fit your specific kitchen, budget, and layout. It's a more useful starting point than another showroom visit before you know what you're actually solving for.
For a broader look at how material choices fit into a full kitchen project, the Materials & Selections hub covers other decisions worth thinking through before you commit to anything, and the Kitchen Remodeling in Broomfield and Colorado's North Metro page covers what a full project looks like from planning through construction.