
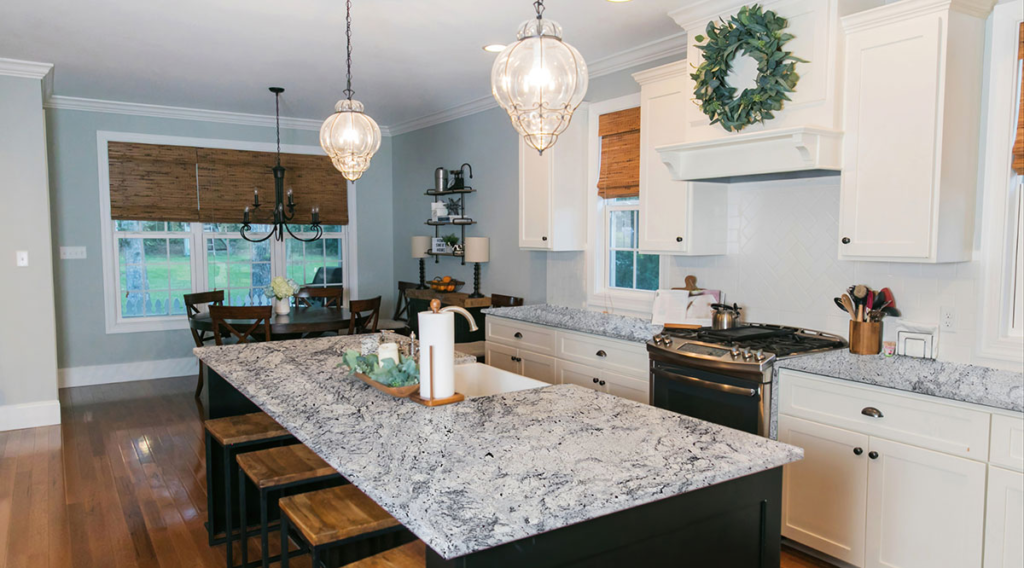
I’m standing in a kitchen in Broomfield right now with my tape measure out, looking at a slab of quartz that was installed about three years ago. The homeowner called me in because there’s a distinct orange-yellow ring around the base of the faucet and a hairline crack near the cooktop. This is the part of the job the glossy magazines don’t show you.
After 22 years as a contractor, I’ve learned that a beautiful kitchen is easy to buy, but a functional one is built. If you are planning a kitchen remodeling project in Arvada or Westminster, the material you choose for your counters isn’t just a color choice—it’s a performance choice. If you pick a material that doesn’t match how you actually live, you’re just buying a very expensive headache.
The Iron Water Trap: Why Your Quartz is Yellowing
One thing I always check before we even look at stone samples is the water source. If you’re on a well system in areas like Erie or Lafayette, you likely have high iron content. I’ve seen this more than once: a homeowner picks a crisp, white quartz countertop only to find orange staining six months later.
Quartz is engineered with about 10% resin. That resin can react with iron particles in your water, or the minerals get trapped in the microscopic texture of the finish. It’s not a surface stain you can just scrub away; it’s a chemical reaction. If you have well water, you need to be prepared for more maintenance or consider a darker, more variegated stone that won’t show the oxidation as clearly.
The Heat Factor: Quartz vs. High-BTU Ranges
I get asked all the time: “Can I run my quartz backsplash all the way behind my range?” Here’s where the math stops working. If you have a high-output professional gas range, that resin in the quartz is essentially plastic. I’ve seen quartz scorch, turn yellow, or even crack from thermal shock because it couldn’t handle the heat coming off the back of a 48-inch range.
If it were my kitchen, I’d use the manufacturer-specified stainless steel backguard or stick to a natural stone like granite in that high-heat zone. Products like Silestone HybriQ+ are durable, but they are still susceptible to thermal shock. Placing a hot cast-iron pan directly on the surface causes rapid expansion, and that’s how you end up with a crack running right through your sink cutout.
Sintered Stone: The Brittle Edge Problem
Sintered stone materials like Dekton or Lapitec are incredible for heat and scratch resistance, but they have high internal tension. This is where the “Contractor’s Notebook” comes in: these materials are brittle on the edges. I’ve seen homeowners chip a mitered “birdsmouth” joint just by bumping it with a heavy pot.
Unlike granite, where I can often resin-fill a chip and make it disappear, sintered stone chips are sharp and notoriously difficult to hide. If we’re doing an island with this material, I always recommend an “eased” or radiused edge rather than a sharp 90-degree miter. It gives the edge a fighting chance against a stray frying pan.
The Structural Side: Don’t Ignore the Deflection
When we do kitchen remodeling in Denver that involves taking out walls to create an open concept, we often install large structural beams. Building code usually allows for a deflection limit of L/360. That might be fine for a floor, but it’s too much movement for a heavy stone countertop.
If that beam “bounces” or sags even a fraction of an inch, your grout lines will crack, and your cabinet doors will go out of square. We have to stiffen those floors and beams more than the minimum code requires to support the weight of modern stone slabs.
Contractor’s Notebook: Supporting the Overhang
I’ve seen too many DIY-style islands where the stone is hanging 12 or 15 inches off the back of the cabinets with no support. Quartz and granite have very little tensile strength. If someone leans on that unsupported edge, or a kid decides to sit on it, the slab can snap cleanly off.
For any seating overhang greater than 10 inches, we install hidden steel “L” brackets screwed directly into the cabinet frames. We even have to recess these into the sub-top so the stone sits flat. Speaking of sub-tops, if you’re doing a mitered edge to make the slab look thicker, you need a 5/8-inch or 3/4-inch plywood sub-top. It has to be perfectly level so the “apron” piece can hang down without hitting the cabinet doors.
Final Thoughts
A beautiful mistake is still a mistake. Before you fall in love with a slab at the stone yard, think about your daily workflow. Do you leave lemon wedges on the counter? Granite will etch. Do you cook with high heat? Quartz might scorch. Do you have high-iron water? White surfaces will stain.
If you’re ready to talk about a kitchen remodel in Broomfield that looks great and actually lasts, let’s look at your space together. We’ll measure twice and make sure the material we order is the right fit for your home’s “behind-the-scenes” realities.