I’m standing in a kitchen in Wheat Ridge right now, tape measure in hand, looking at a set of stacked drawers that the homeowner is ready to finish. We’ve already gone through the heavy lifting of the kitchen remodeling process—the walls are plumb, the cabinets are set, and the stone is down. Now comes the part that most people treat like jewelry: the hardware.
But as a contractor, I don’t see hardware as jewelry. I look at it as the primary point of contact between you and your house. If it’s wrong, you feel it every time you make coffee. If the alignment is off by even a 1/16th of an inch, it’s all I can see when I walk into the room. Choosing the right cabinet hardware isn’t just about the finish; it’s about clearance, leverage, and making sure your drawers actually open.
The “Pinch Grip” vs. The D-Pull
One thing I always check during the design phase is how the homeowner actually moves. I’ve seen homeowners spend thousands on high-end knobs only to realize later that they can’t get a good grip when their hands are wet or if they’re dealing with a bit of arthritis.
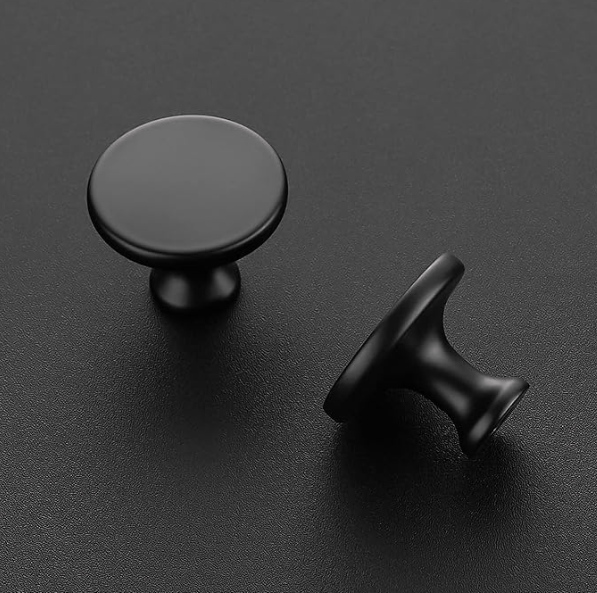
I’ve started recommending D-style pulls over knobs for almost all base cabinets. It’s about accessibility. A knob requires a pinch grip; a pull allows you to hook a finger or two through. If you’re planning to stay in your home for the next fifteen years, think about how those hands will feel then. Design the kitchen around your life, not a photo you saw on a screen.
Contractor’s Notebook: The Three-Inch Corner Rule
Here is where most DIY-heavy designs go sideways. I’ve seen this more than once: a homeowner picks out beautiful, deep, high-profile pulls for their modern kitchen. They look great until we try to open the drawer in the corner.
If you have two cabinets meeting in a “dead corner,” those deep handles will strike the adjacent drawer face or handle. I always look for at least 1.5 inches of filler, but a 3-inch corner filler is the safe bet for clearance when using modern, chunky hardware. Without that dead space, your drawers will only open halfway before they’re blocked. A beautiful mistake is still a mistake.
The Scribe vs. Filler Debate
When we talk about how hardware and cabinets meet the walls, I’m looking at the gaps. In many older Colorado homes, walls are rarely plumb. Homeowners often ask why we charge to “scribe” a cabinet or use a filler strip near a wall.
Here’s the reality: if we put a cabinet flush against a wall without a filler, your hardware—or even the door edge—will hit the drywall before the door is fully open. You won’t be able to pull out your interior roll-out trays. I prefer using an “integrated filler,” where we order the cabinet with an extra-wide vertical frame piece and shave it down on-site to match your wall perfectly. It looks cleaner than a separate piece of thin scribe molding and keeps your hardware from denting your new paint.
Why I Don’t Eyeball the Drill Holes
Drilling for handles is the final, permanent step. There is no “undo” button once the drill bit hits the wood. I’ve seen too many high-end kitchens look amateur because the installer decided to “eye” the center point.
Even if the door sits slightly crooked due to a floor settle (which we usually fix at the hinge), the hardware must be measured from a consistent point on the door corner. I never let a crew start without a professional-grade adjustable drill template. We set the measurement—say, 2 inches from the bottom and 2 inches from the side—and we lock it in. This ensures that when you look down a long run of cabinets, every single pull sits on the exact same horizontal plane.
Finishes: The Tarnish and the Fingerprints
I often get asked about the gold and brass look that’s popular right now. One thing I always check is whether the homeowner understands the difference between a “living finish” and a PVD finish.
– Unlacquered Brass: This is a living finish. It’s going to tarnish, spot, and change color where your fingers touch it most. If you want it to look like a weathered antique, go for it. – PVD (Physical Vapor Deposition): If you want that gold look to stay exactly like it is on day one, you want PVD. It’s a molecular bond that is incredibly tough.
Also, a word on high-gloss finishes: I’ve seen homeowners choose high-gloss acrylic cabinets only to realize that the area around the hardware shows every fingerprint and water spot from the sink. If you aren’t prepared to wipe your cabinets daily, stick to a matte or brushed finish on your hardware to hide the oils from your hands.
If It Were My Kitchen
I’d use 5-inch or 8-inch pulls for everything. Knobs are fine for small upper cabinets you rarely touch, but for the heavy hitters—the trash pull-out, the heavy pot drawers, and the pantry—you want leverage.
I’d also make sure my under-cabinet lighting is planned *before* the hardware goes on. I’ve seen cases where beautiful hardware creates weird shadows on the countertop because the LED tape was mounted too far back. Light the work first, then worry about the shine.
Final Thoughts
Hardware is the last thing to go on, but it should be one of the first things you think about when laying out your clearances. Don’t let a $15 handle ruin a $30,000 cabinet package because you didn’t leave enough room for the door to swing. Measure for the handle, use a template, and prioritize how it feels in your hand over how it looks in a catalog.
If you’re ready to stop looking at pictures and start measuring your actual space, let’s talk about how to make it work for you.